| Home | Newsletter | Locations | Diary |
|
Indexes |
|
|
|
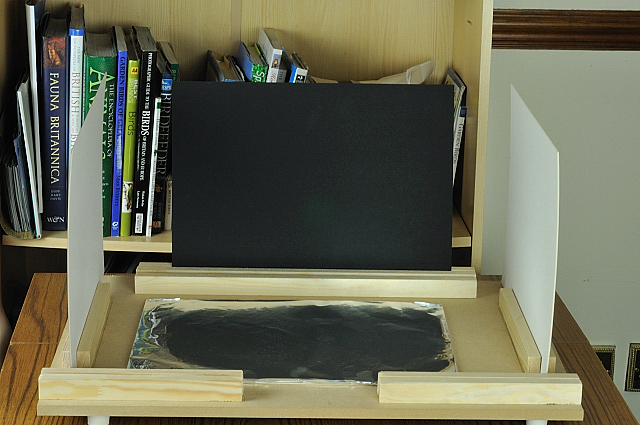
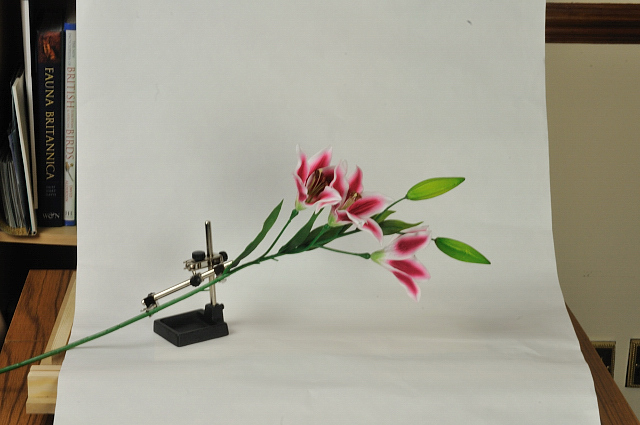
Article Macro Studio/Background System ProjectIn this project I am going to show you how to go about creating a mobile macro studio/background system, like the one below, for use when needing to do close-up photography. As well as showing you how to think creatively to make different backgrounds to be able to generate different effects with lighting.
To make it easier to explain how I went about it I am going to use a specific size of 24" x 18" to be used for taking macro shots of flowers, but you could make any variation on this of different sizes in order to cope with your macro needs or for different macro projects. For example if you want to photograph small items such as coins, stamps etc, then you could make a smaller version or if your needs are larger and you have room then you can scale it up to meet this need. You can see from the picture the structure of the backing board supports are placed on the board leaving the corners clear, so that the backing boards being used in them can slide in from either corner, giving greater manoeuvrability, but also allowing any length of card to be used. But you will also notice at the front there is a space between the two sets of smaller supports, this is to allow the camera lens to go through when doing really small items and micro work, but still be able to use boards at the front for reflectors etc. In order to carry out this project you need the following items.
Before you go to buy your baseboard it is a good idea to already have a sketch of what you are trying to achieve and have worked out the size you want for the baseboard, that way if you are not confident that you could cut the baseboard to the quality and standard you would want to have, then some larger DIY centres will cut it for you, to the size you specify. I purchased a piece of MDF which was 48"x24" and got them to cut it into three pieces, two 24"x18" pieces and I was left with a spare smaller piece of 12"x24".
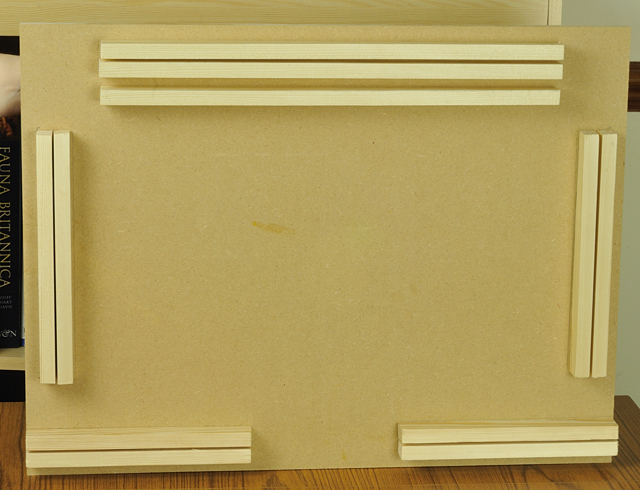
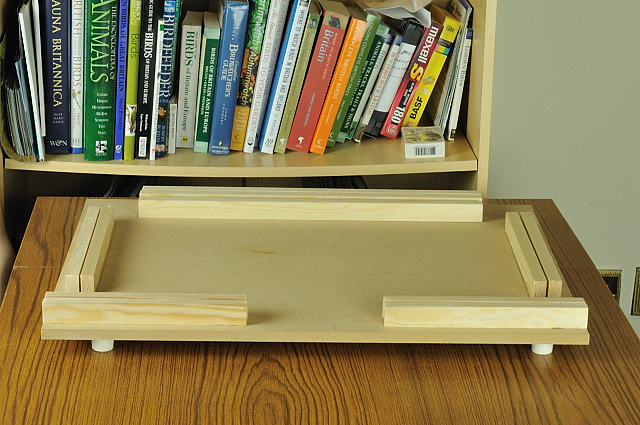
You also need to have worked out how many strips of wood you need and at what size to create the supports for the mountboard so that you buy the correct amount of strip wood. I decided to have back strips of 18" long and because I wanted to have one slot to hold the mountboard upright and another to be able to have the backing board slope back slightly, I needed 3 pieces this length. The side runners were to be 10" long and I needed two on each side, so need 4, and the front supports were to be 8" long and with two each side meant I also needed 4. So I need 3 x 18", 4 x 10", and 4 x 8" giving a total length required of 126" (320cm). Construction Tools required include:
Your board is now complete. Now lets turn our attention to the backing boards and what you can use or design to use with this system.
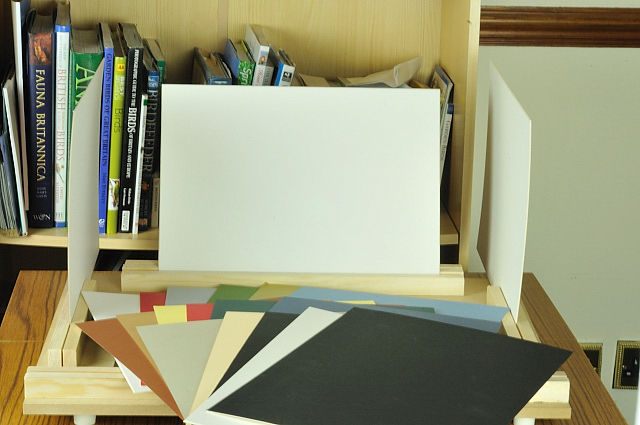
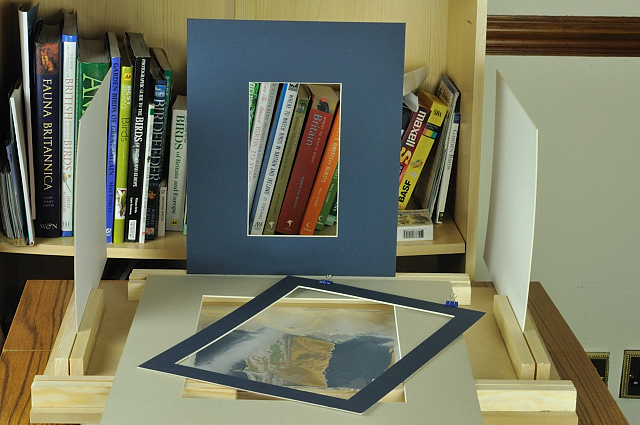
Backboards
You need to use a material that is strong
enough to stand in the slots. I have used framers mountboard. This is
thicker than normal card and is more rigid at larger dimensions, but also
comes in a range of fabulous colours. You can buy mountboard in A2 size
from any hobby or art shop, or you could even ask your local framer if
they have any they could sell you, or even scraps that they might be
prepared to give you. Create yourself a range of colours and be creative
you could add acrylic paint washes to some, or add a marble effect and
some you could glue colour felt to to give a softer background. Remember
to have white and black options which can be used as reflectors and
stops/flags. Have different sized pieces to cope with smaller to larger
items, but also those being used in the side and front slots may want to
be shorter so that the camera and flash units can go over top. You could
also create yourself a chromokey version (green or blue) so that you could
add a different background afterwards in editing. See our article on
Chromokey
Backlit Board As well as using coloured boards as a background of course you could always create a backlit background which would allow you to add light from behind the subject, and when using flash you could use coloured filters to provide coloured light effects behind your subject. It would be wise to use mountboard for this as it is more rigid and you are going to be cutting a hole in the middle of it to shine the light through. Now you probably don't want the direct light it would be too harsh, so to diffuse it you could clip a large piece of white paper to the front of it and shine the light through this. If you use A3/A2 sized paper you can create a curve and avoid harsh lines in your image. Backlit Base Board Sometimes you may want to have light coming up from the base of the board, under lighting your subject giving more depth. To do this there are two possibilities. The first using mountboard, foil and paper, the second using a clear acrylic sheet. The Mountboard Option. Cut a mountboard backboard with a hole cut out of the middle, the light will be coming through here. Cut a second piece of mountboard to the dimensions of the baseboard inside the support strips and cover with foil, this will act as a baseboard reflector. Cut a third piece of mountboard so that it will sit on top the inside supports and cut a U shape out of this. Place the backboard in the back support and the foil covered board in the base, then lay the U shaped board on top of the inside front/side supports. Take a piece of A2 paper and clip onto the top of the backboard and curve over the U shaped board, using clips on the edge to hold in place. Now you can shine the light/flash through from the back but also end up with the base lit as well.
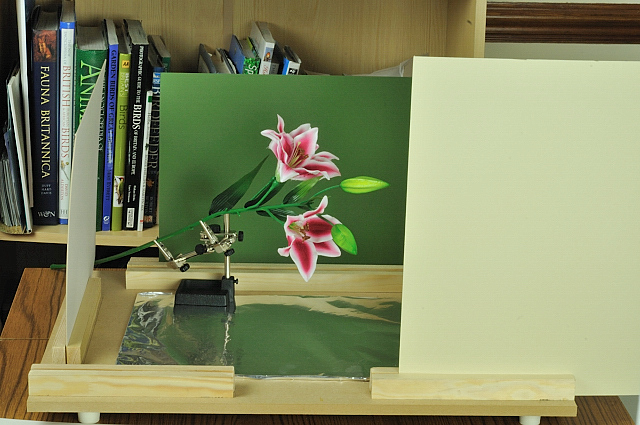
The Acrylic Option. Cut a piece of clear acrylic sheet to the size which will fit on top of the inside supports. Place on top and position the light source to shine under the board. The main advantage of the acrylic sheet is that it will support items of heavier weight to the paper version above. Backlit for Flower Heads A variation for backlighting an item is to take a piece of mountboard and cut a large hole out of it, but leaving enough board to give rigidity. Take some thin coloured paper, this could be 80gsm or less paper, tracing paper or tissue paper, and cut to the same size as the outer dimension of the board. Place over the front of the backing board and hold in place with clips. Place the whole thing in one of the back slots and shine the light from behind. Alternatively you could use white paper and coloured filters on the flash head to give colour.
Side High Lights Highlighting with flash from the side can add different dimensions to the final image by adding targeted shadows. You could just flash from both sides reducing or increasing the exposure of each flash head or you could flash high up from one side and use a white backing board in the opposite side support to reflect the light back. Another alternative for more targeted light is to create yourself a flagging system. To do this take a piece of backing board and create a large hole in the centre, again remember to leave enough edge to keep it rigid when in the support. Then take a number of sheets of thicker paper or normal office card and create shapes in different ones to create different effects. Hold the card in place with clips and position on the board for the light/flash to go through.
With any of the backboards we have mentioned here have a go, experiment and try out different variations until you get the effect you want. There will be many more combinations that will work and if like me you like working with flowers or doing macro I hope I have given you some inspiration to have a go.
|
||||||
|
||||||
| . | ||||||
|
||||||
|
|