|
|
|
Article Capturing slices with a Nikon DSLRIntroduction Slicing is a photography technique that every professional and most competent enthusiast photographers should be able to handle. It allows you to get sharp images where those with lower skill levels are limited to producing 'artistic' work. If this is new to you see the article
Introducing slicing.
If you have not tried this before, then try
our project Depth of field
magic
There are at lest two programs available
that allows you to put the slices together, and we cover these in the
Introducing slicing
You can capture slices with any camera, they are just photographs where the subject, camera and lighting do not change but the point that is in focus does. This article is looking at just how we go about capturing slices if you have access to one of the top range of Nikon DSLR cameras. If you have another make it could still be worth reading as you may have access to similar facilities and software for your camera. We are using Nikon Capture Control 2. You
can get a 30 day trial version of this, without cost, from the Nikon website.
Link to Nikon UK.
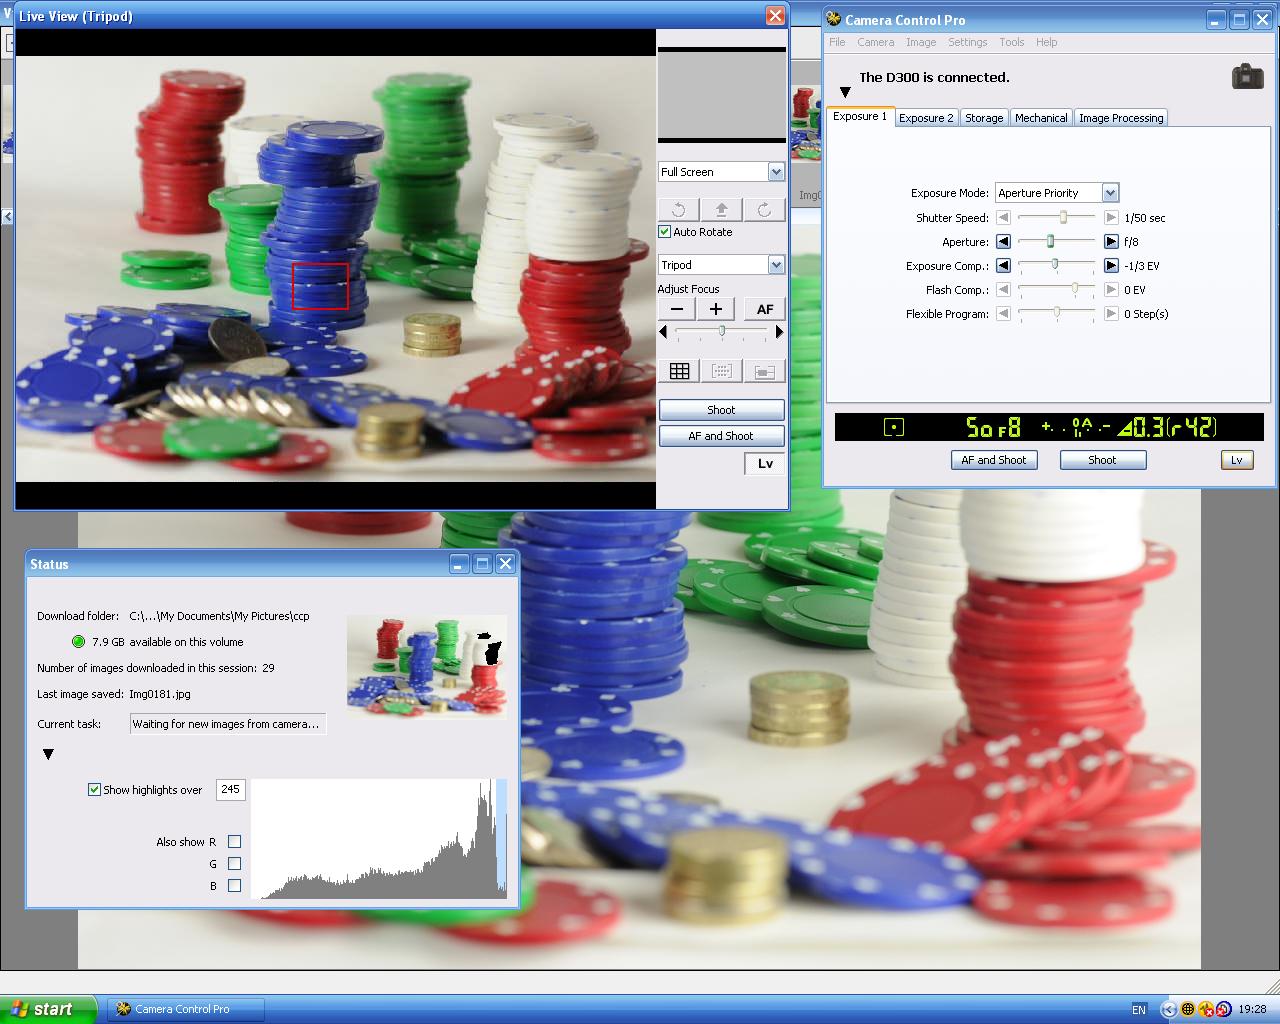
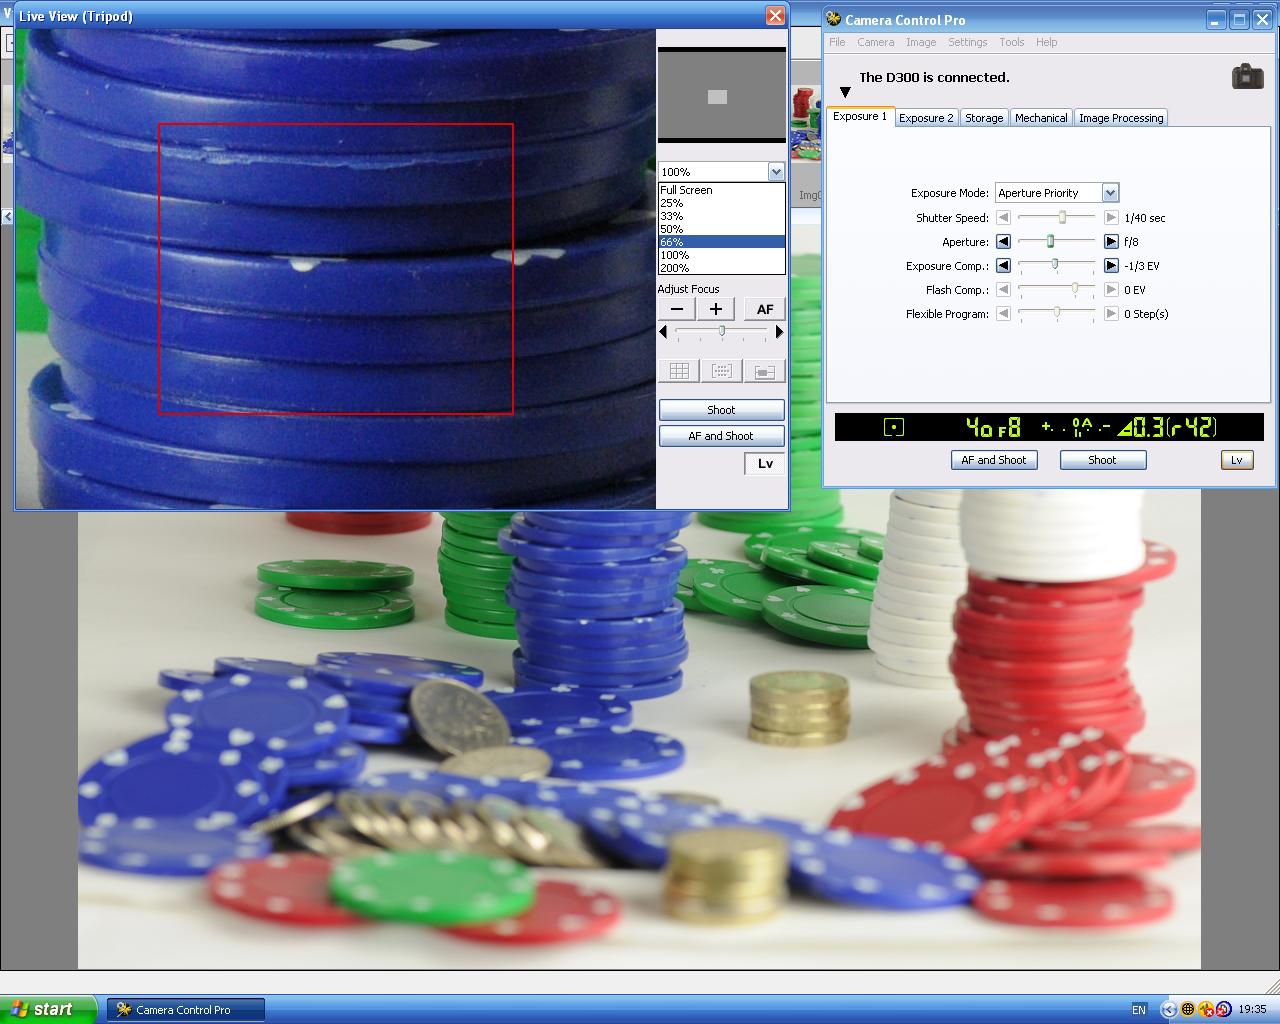
Nikon Capture Control 2 on a laptop, background is the image viewer, top right is the main camera and exposure settings, top left the Liveview controls and below is the last photo taken and its curve. You can click on any of the
screen displays on this page to see a full screen sized image in a new
window. If it does not show then check you don't have pop ups blocked. We
never have pop up adverts on this site, so you can unblock this without
concern. If we are taking you to another website we show you with the red
link symbol.
The images used on this page
were taken when creating the set of slices for the chips slices set - you
can see the results of these and download the slices sets and resulting image
from Slices - Chips.
Slicing on a Nikon This article is most relevant to any of the Nikon DSLR's that have Liveview. The slices that you can see used in the
project Depth of field
magic,
If we are going to use slicing as a production tool, for example with macro photography, product photography, food or property photography we need to be able to get what we want and when we want it, and for the editorial, advertising, commercial and industrial photographer economically. I can achieve this toady, reliably and without difficulty, and would like to share with you how this is possible. You don't need all that I use but lets take a look at my setup for the coin example and several other setups that were taken at the same time. The equipment Nikon D300, lens usually a macro lens in the case above Nikon 105mm macro, camera on a focusing rack, on a tripod. I used a Nikon EH5 power supply, just simply so I did not have to watch battery levels. The camera was in Liveview (tripod mode) and connected to a laptop computer running Nikon Capture Control 2. The laptop had a larger screen and a mouse plugged in. Camera also had a 90 degree viewfinder just for ease of positioning. The subject
was at table height lit by 2
cool-lights
I did not have a pan and tilt unit between the tripod and camera on this occasion but some times this is useful as it allows the camera to be moved finely up, down and from side to side. I tend to use this more where I want to control the camera at a distance than for macro use. We can do most things now remotely, the major item that we still have no way of remotely controlling is the zoom, when a zoom lens is on use. Working method I set up the subjects, lighting, tripod, camera and 105mm macro lens, setting the camera up initially using the 90 degree viewfinder. I put the camera onto spot metering.
exactly as I expected it to be.
Confirming that it is, the
slicing capture is complete. I then transfer the images to my desk
computer where I have more processing power, multiple screens and
importantly the editing and special programs. In this case I will be
using Helicon Focus.
Alternatives The most likely alternative would be to use flash instead of the cool-lites. This might have some benefits with very close (magnified) macro where I have the Nikon R1C1 kit (several SB200 flash units connected to the front of the lens with other accessories in use). Using spot metering the flash is the main light, it only uses balance flash when matrix and centre weighted is in use. This means I can work with enough light to focus. Focusing works well and the image quality on Liveview is good when you have enough light. With flash make sure the flash units have recharged and are ready between each shot/slice. You can use Liveview on the tripod and use tripod mode without Capture Control 2, using it directly on the back of the camera, you can make it focus at any point. You can also magnify the screen. You may find you need to have someone to help you and have a small item that the camera can easily focus on and use this at varying points back through the scene to allow the camera to focus for each slice. Alternatively using the manual focus you can fine focus on the blown up section of the image. This is of course harder work and far more time consuming than using the electronic control approach. If you were producing slices of a landscape scene or similar you could take them using normal viewing and auto focus being moved to the relevant points. The points to remember are that the camera needs to stay still, including the zoom, and nothing should be moving in the scene. If you are using the Nikon 18-200mm VR lens and many lenses by other manufacturers, you need to watch out for lens zoom creep if the lens is pointing at an angle down or up.
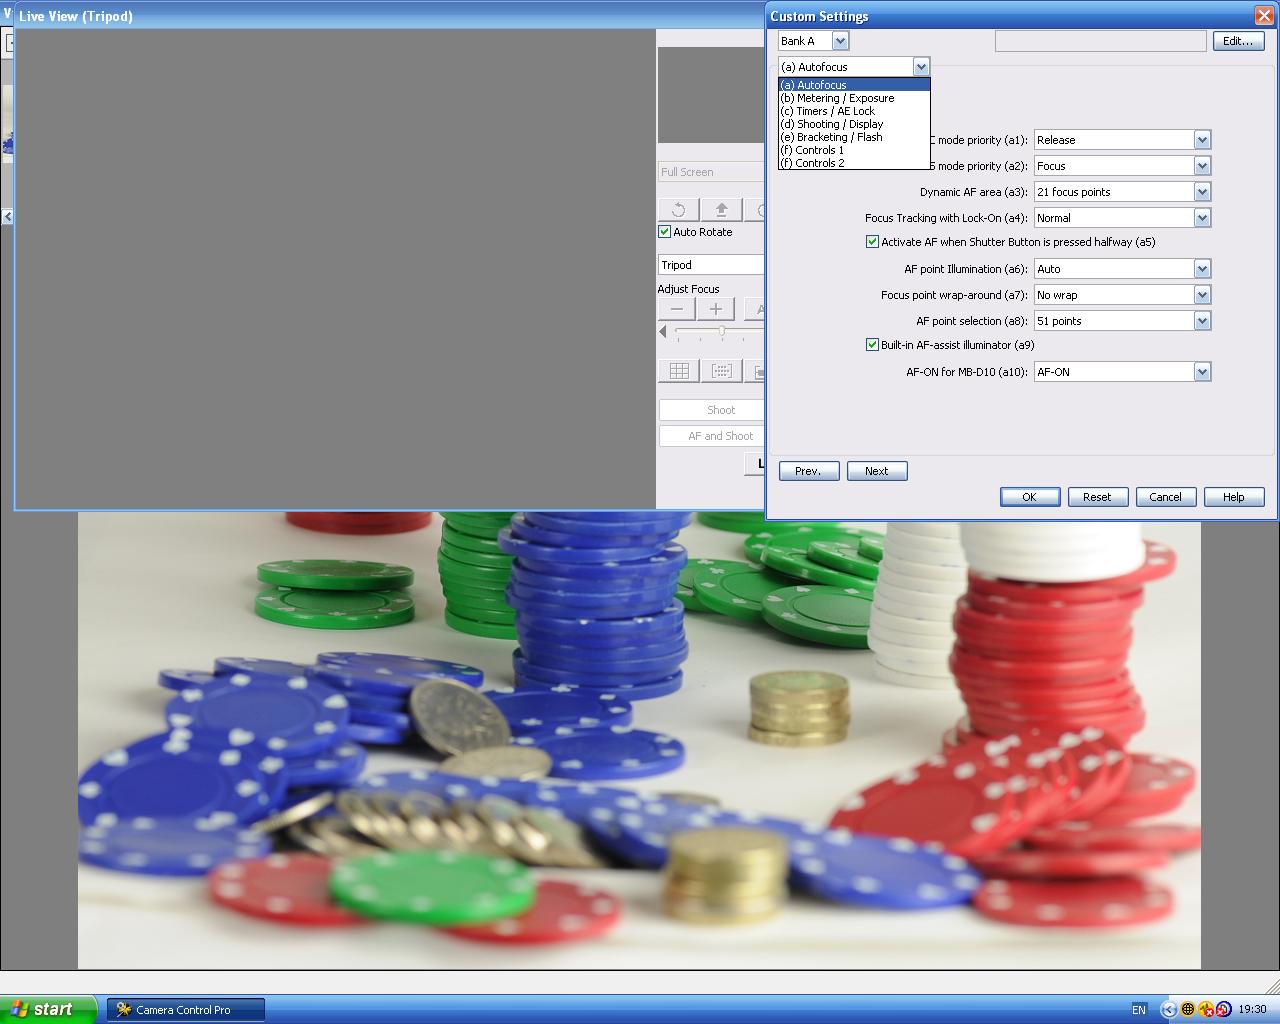
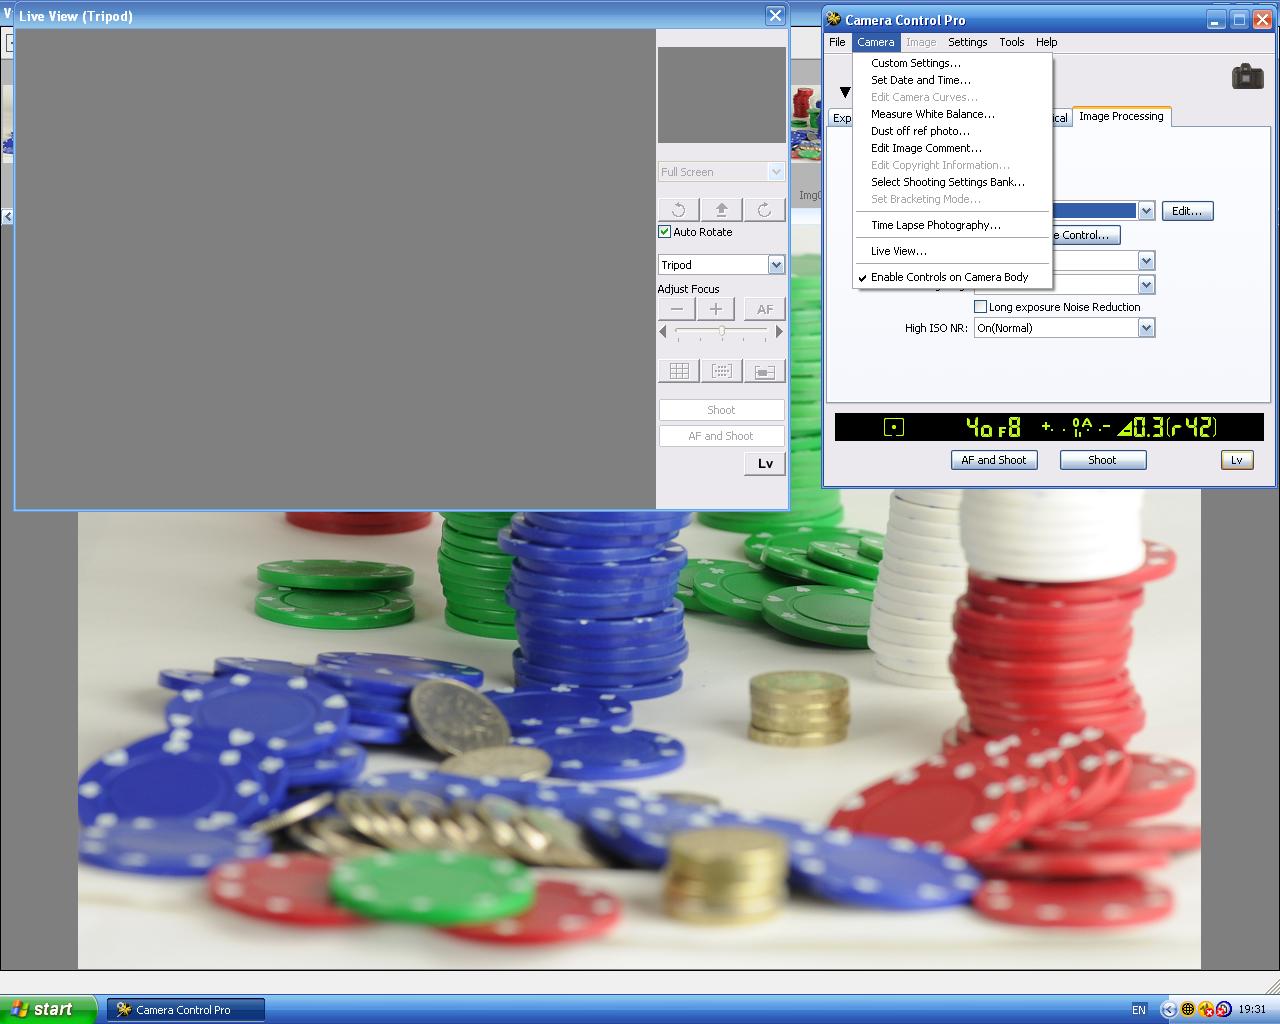
2 of the screen displays with menu drop downs allowing more settings.
The images used on this page were taken when
creating the set of slices for the chips slices set - you can se the
results of these and download the slices sets and resulting image from
Slices - Chips.
|
||||||||
|
||||||||
| . | ||||||||
|
||||||||
|
|