Article
Photographing Flowers In Your
Home
With florists in the High Street, the
profusion of garden centres and even supermarkets selling cut flowers there
are still opportunities for the flower photographer to get in some detailed
work and practice even if you don't have a garden or are unable due to
season, weather or disability to be able to get out to the many
Gardens Open to the Public.
 All you need is good quality flowers, a few props and a
mini indoor studio. All you need is good quality flowers, a few props and a
mini indoor studio.
Flowers come in all types, shapes,
varieties, sizes and colours. You can get coverage from single stem cut
flowers, through to small plants that will fit in a window box or indoor pot
plants, or others that will go into containers as well as in your
garden. Even for the outdoors there is some form of flower available all
year round. Transporting a container in from outdoors is both
heavy and messy, so here we are going to concentrate on photographing the
indoor pot plant or cut flowers you can get from florists or supermarkets.
|
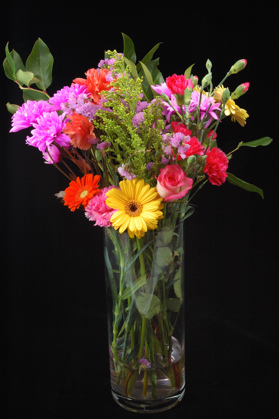
Supermarkets generally sell bouquets of
flowers usually arranged in some manner, and you have the opportunity to
photograph the full set or to take it apart and do the individual stem. The
quality that you get from your local supermarket will vary with the time of
day you buy them and how long they have had them on display, but generally
if you can buy bouquets that have a number of buds in them as well as those
already in flower, you can photograph them at this stage and in a few days,
have the opportunity to photograph them again when fully out. Choosing your
bouquet could be difficult with all the different colours, some will have
the flowers at different stages in their lifecycle in different bouquets, so
it may be necessary to buy a couple of bouquets to get the combination that
you require. Don't however get carried away and buy too many, unless you are
going to photograph them over a number of days, you'll be surprised how long
you can spend photographing flowers in all their combinations.

|
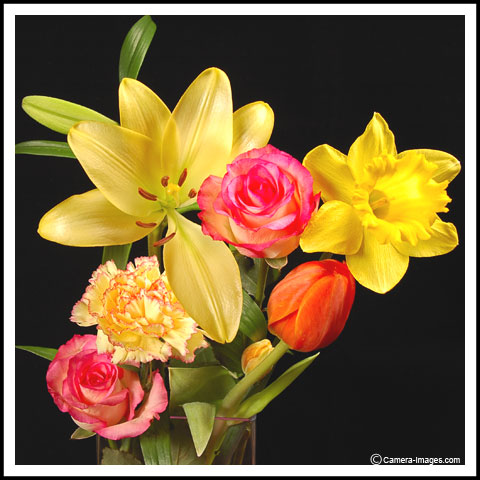 |
Florists also sell bouquets, but the main
advantage with a florist is that you can buy single stems, and only need to
buy what you need, when you need it. You can choose the best quality stem
they have and be picky, buy those that you want to photograph, have the
flexibility of building your own designed bouquet or getting the florist to
do the design for you. If the florist is close to you, you can buy what you
need for that particular photo shoot and can buy the best specimen in full
flower. You can also ask the florist what each one you have chosen is
called, remember to get both it's common name and it's official name,
especially if you are expecting to get the photographs into publications, or
picture libraries who usually want this information.
Treating cut flowers when you get them
home
When you get cut flowers home you need them
to look good for a reasonable amount of time. So I have found doing the
following steps I have been able to keep cut flowers for 3-4 weeks. You do
loose some along the way, they naturally go over but others that are in bud
can last this long. Take the following steps and you should end up with
flowers you can photograph a number of times over a period.
|
 |
-
Take a clean vase and half fill it with water. If your bouquet came with a
sachet of plant food, then mix this in.
-
Diagonally cut the bottom of the stem off about 2cm up. Use a good pair of
cutters/scissors so that the stem doesn't get crushed or bruised.
-
Remove all foliage that is going to be below the water level. Left it will
just wither and is of no use anyway.
-
Arrange in a suitable vase.
-
Place the vase in a position out of direct sunlight, away from draughts and
heat sources.
When photographing them, even if doing
single stems the answer is to keep them in water in between shots.
If they are still good after a week, then
cut off a further 2cm diagonally, and any excess foliage below the new
water line, remove any dead flowers, or petals from roses etc and replace
the water, adding more plant food. You may need to change vases if the stems
are now shorter than the rim of the vase you have been using. Repeat this
task until you have had enough of them or they are completely gone over.
Some people if they don't have plant food
use economy fizzy lemonade and water combined. |
Studio/Space
The term studio in the case of flower
photography doesn't have to be a large open space, just enough room to set
up the equipment required (see below) and for you to move about. If you
don't have the obvious of a garden shed, garage or some other space that you
can use then you can set up a temporary studio within your own living space.
This could be a front room, conservatory, guest bedroom or any other space
in your home. Unlike portrait photographers, who need a decent sized working
area to get in people of all different sizes, flowers are small, so the
amount of room required to set up your mini studio is not that great.
Kit/Equipment required
Which lens you decide to use will be down to your own choice, however you
will find that a 60mm lens or setting a zoom at 60mm, which gives greater
depth of field,
will be ideal for indoor studio photography, particularly for doing flower
displays. Larger lenses such as a 105mm would be okay for single stem and
close ups of buds, flower heads, but for doing flower displays you would
need a much larger working area/studio to get the correct depth of field.
Zoom and prime lenses all have a closest working distance, and you may need
a macro lens to get close enough to photograph flower heads or buds, I use
both 60mm and 105mm macro lenses. Zoom lenses can be used, providing that
you watch the minimum working distance. Besides your camera and lenses, you
will also find the following useful:-
Flash metre - when using studio flash
or fixed lighting you can use a flash metre to measure the amount of light
on the subject for the
ISO setting
you are using. The reading gives you
the
aperture
(f stop) you need to set the camera at for the speed you
want. If you don't have a flash metre it is not essential as you can work
it out for yourself by using the
Flash Guide Numbers
on your flash unit.
If you are using the Nikon
creative lighting system,
your camera and flash
can work out the exposure without the need for a flash metre.
Optional Wireless Transmitter - used between camera
and flash lights to avoid cables running everywhere - encourages
manoeuvrability on the part of the photographer.
Optional tethered or wireless operation with
a computer allowing pictures as taken to appear on the computer and often
for camera settings to be changed from the computer. As well as the photographic equipment
needed to run an indoor flower studio you will also need some props. These
props will be used to enhance your images by allowing different background
colours, having objects to support them like vases or for single stems some
form of gripper/holder, alternatively if creating still life images then you
may want to include more than just flowers, like fruit, objects etc.
|
|
Backgrounds - if you are using a
Light Cube
then it is likely that it came with at least 3 colour backgrounds. Light cubes are
usually white and the backgrounds supplied are usually kept in place with velcro spots. If you are not using a light cube then you could use
coloured card, I find coloured mountboard used by framers is quite good, it's
thicker than normal card and can be stood up with limited support. You can
get it in different colours from a hobby shop or artists supply shop in
most high streets. Alternatively you could use colour material supported
on stands, but make sure there are no creases in it as if included in the
image it will distract from the centrepiece.
Vases - this is the obvious reciprocal to hold cut flowers. They
can have two uses firstly to hold the flowers between shots, but also to
include within the image. Vases come in various different forms, including
glass, metal, pottery like terracotta and ceramics and wood. They can also
come coloured or painted in plain colours from the pastel to the deep
vibrant colour or can be highly decorative with too much going on, glass
vases can be transparent, translucent and opaque. Take a look at our
Selecting Vases
article for some
pointers on what to look out for when finding the right vase. |
|
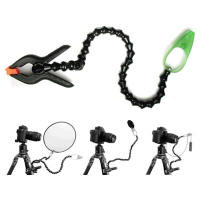
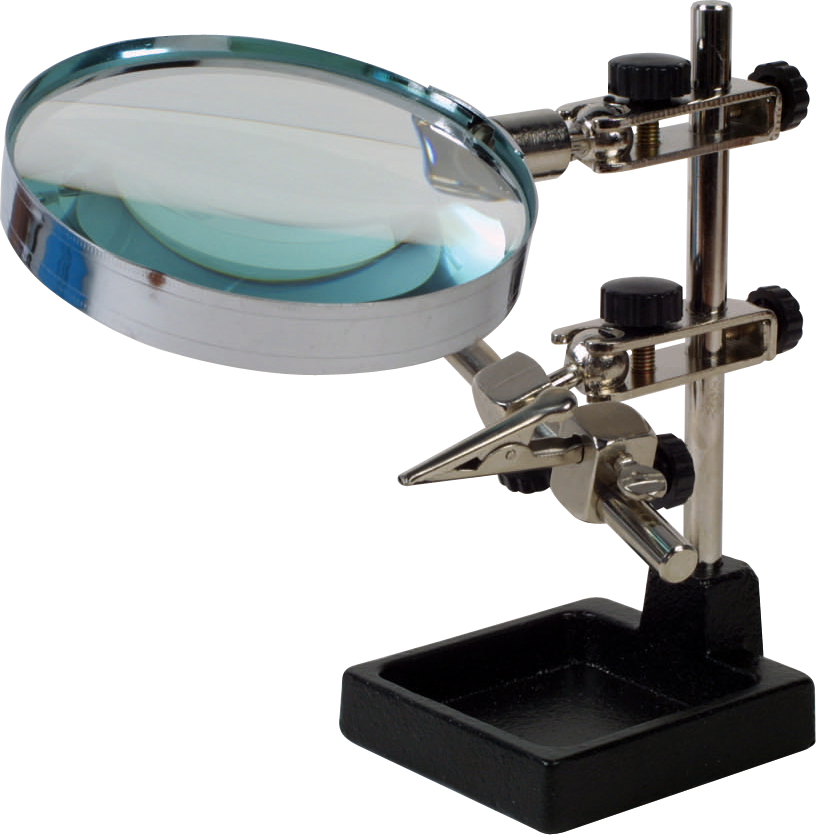
Holder/clamps/Gripers - useful when doing
single stems. There are clamps specifically made for taking pictures of
plants, such as the Novaflex Flower Stalk Holder which has a light spring
for delicate items it also has a 1/4" thread socket which allows it to be
attached to Novaflex's range of rods and flexible arms. Another option is
the Wimberley Plant a flexible arm which can be clamped both to the item
you are photographing and at the other end a solid item such as a tripod
or table etc. You could also make some supports yourself using sticks,
string, clips or elastic bands or you could use a 'Helping Hand' with
magnifier which has adjustable joints and crocodile clamps to hold the
subject still. |
Techniques
|
|
White
Balance- When working indoors
White Balance
and
colour management
is a major issue. Invariably you will be
working in mixed light conditions, a combination of room lights, flash
lights and light coming in from a window, and all these will have an impact
on the colours of your subject. So use the PRE setting of your camera to set
up the white balance for the conditions you are working in. You should only
need to do this at the start, unless you change the lighting
conditions as you go along or the light changes due to time of day, changing
weather or moving items. See
How to Set and use Pre
for details on how to do this. Composition - Even when working in a
small space think about the
composition
of the final image. You could plan
and draw some sketches of what you are trying to achieve before you start.
Taking into consideration backgrounds, colours, other objects you want to
include, the space you are working in. If using a
Light Cube
you will also
have to take into account what can be achieved within the size of cube you
have, this may restrict the size of arrangement you are using. From this you
should end up with both a shooting list, and a list of flowers and objects
required for the photo shoot. For composition ideas take a look at what is
popular at the moment, close ups on flower heads, bright colours, table
arrangements etc a look through magazines, greetings cards and local
designer shops may give some inspiration. |
|
Vases what to watch out for - The problem
with a vase is that they are usually made of glass which is very
reflective. They can also be made of metal or painted pottery which also
has a reflective element. Glass vases can also be transparent, translucent
and opaque and all of these qualities can pose some challenges for the
photographer to overcome. With glass, metal or any reflective surface you
have to watch out for what they are picking up, this could be: |
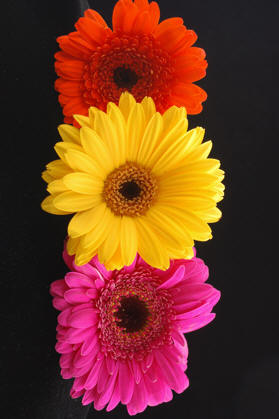
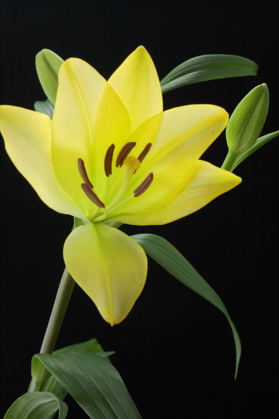
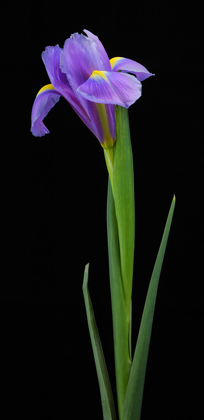
| Single Stem Photography - this
includes doing the whole stem including flower head, roses are good for this
as they have detail on the stems as their leaves are large and can be
arranged. Taking single stems can be done from above in which case you will
need to lay it down on the background of choice and get your tripod over the
image. You can use the light cube if you lay it with its opening pointing
upwards, but you
could use diffusers and reflectors to soften and bounce the light to where
you want it. On the other hand you could use a clamp or some other means to
stand the stem up in the light cube. Interior designers like close-up images
of flowers, particularly roses and lilies, which have an element of texture
to them and they usually come in dramatic colours like reds, pinks, yellows
etc. and can be a bold statement when on a wall.
Water effects - adding water globules
on flower heads or leaves can add depth, texture and a focal point to a
close up. Water can also add sheen to something that may look a little dull.
Used wisely and creatively it can look pleasing. One thing to watch out for
with water globules is their reflective properties as close-ups could
produce images of the camera or flash lights in the water. One way of adding
the water is with a mist spray.
As well as photographing the full flower,
flower head, bouquets, pot plants etc there are also opportunities to do
some macro photography taking close up images of the stamen's, pollen,
close ups on petals showing the veins and crispness of them, and
therefore generate artistically created images. For more information on macro photography see
our article
Macro or Micro Photography,
which looks at the advantages and effect of the different methods. You may
need tubes
in addition to a macro lens in order to get close enough. |
 |
I hope this has provided some inspiration and
ideas for you to have a go at flower photography.
Also if you want some help on what you can do with the photos now you have
them then take a look at our article
Uses of
Garden Photography,
as many of the outlets here are similar.
See Also:
|