| Home | Newsletter | Locations | Diary |
|
Indexes |
|
|
|
Article Macro PhotographyMacro or micro photography is all about photographing small items, it may be product photography, showing the detail in a small product or part, or it might be the exploration of the world around us from a completely new perspective.
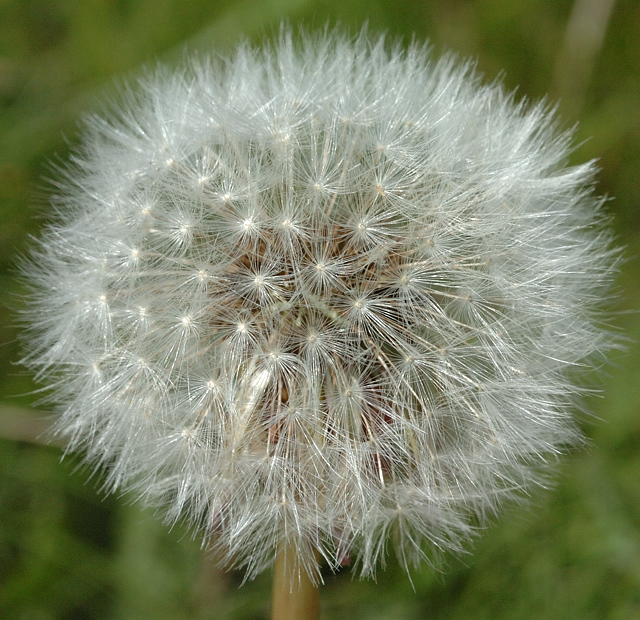
Every day items in this case dandelion seeds are detailed when you enter the macro world. Large items get photographed all the time, and you will be more familiar with photographers of a tiger than a fly, although the tiger is rare while unfortunately flies are not. Go a stage further in both directions and I am sure you will recall seeing the view of the earth from space, but have you seen the eye lashes of a butterfly, they are long and shaped. This is even more surprising when its unlikely that you could go and take a space photo but need very little to photograph the miniature world around you. There are many other uses for macro photography, take for example one use I made of it many years ago. Advertisements on the front page of a newspaper was expensive but inside was far cheaper, so I photographed everyday items close up and put a small photo in an advertisement on the front page, and the page number where they could see what it was. Running a whole series over a period of time. I included the ball of a ball point pen, the points of a table fork, the eye of a needle, the wing of a house fly, bread up close, paper so close you could see trough the gaps in its structure, and a lot more. It worked in that people became used to seeing the picture and immediately turning to my advertisement inside, I had more effective advertising than if I had used a large front page advertisement. I have recently been looking at an internet project that will use a similar technique, again with macro photographs, so perhaps you will see this some time soon. Getting Close To get close to a subject we need either a macro lens, close up lenses, or to use a spacer between the lens and the camera as with a tubes or bellows. We can use a combination of these, plus reverse the camera lens in some situations. All lenses have a minimum focusing distance, and some manufacturers class this as macro when it gets to a 3:1 ratio, by this we mean that an item the size of a cameras sensor will take up a third of the width of the sensor. Some others will not class this as macro and refer to macro or micro when its 1:1, where the item is the same size as the camera sensor and now filling the frame. We have an article
Macro or micro photography
Exploring the different equipment we have
an article on
Close-up Lenses,
The article
Stepping rings The next step to the macro lens is using
tubes & bellows,
Photographic Challenges Challenges for the photographer involve being able to hold the camera still, being able to move the camera and/or subject, the background for macro shots, lighting, getting the colours right and coping with the limited depth of field available. For a lot of macro photography we need to
hold the camera still, and a tripod or clamp with a head is necessary.
Outside we will often use a tripod but when in our homes or studios we can
come up with a range of working options including using clamps and devices
that are designed to hold
multiple
cameras.
Moving in small steps, without needing to
jump the tripod forward and back can be achieved fairly roughly by using a
tripod where the column turns to run horizontally instead of its normal
vertical position. To be able to move more accurately and in small amounts
so as to precisely focus, requires a special unit that fits between the
tripod and camera. Given the general classification of focusing racks there
are a variety available, most slide or move back and forwards but some also
have sideways adjustments. The one I use is the
Novaflex Castel-Mini
In many situations when dealing with a lot of cameras and attachments all connected up and a small item, its easier to lock the camera in a fixed position and move the subject instead. Your miniature studio For backgrounds with studio macro shots, I
can use a
light cube
Depth of Field
Depth of field
If we still have a problem and with
extreme macro we are likely to have, as well as with macro of some large
items close up, then we are going to need to turn to a technique called
slicing. Slicing involves taking a series of photos at different focus
points and putting the images through a special piece of software that pulls
out the sharpest piece from each photo to produce a single sharp image
throughout. See more in the article,
slicing. Getting the colour right Getting the colours correct involves using
the
PRE white balance setting
Lighting the subject
When photographing something very small we need quite a lot of light to get a good photo, both because the amount of
light reflecting from the subject now has to be spread out across your
picture area, but also as we usually will want to use a small aperture to
get as much depth of field as we can. We are often limited in how much light
we can use, not only technically but also as we don't want to burn our
subject, and light always produces heat. Flash will usually be the best
choice as it can produce a lot of light for a very short burst. The Nikon R1
kit and R1C1 kits, which is
the same thing with a commander unit, and designed for macro photography.
You will find an article on all the current Nikon Flash units including the
items in the R1CI kit in Comparing Nikon Flash
Units.
Another possibility, although not producing
as much light on the subject are
cool-lites,
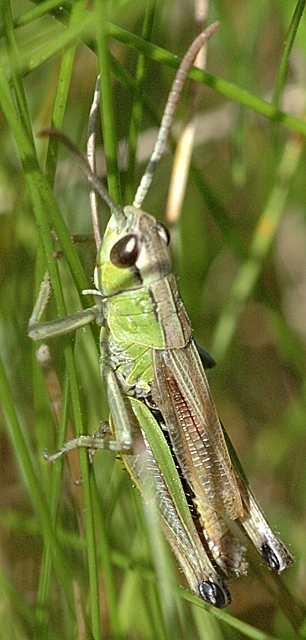
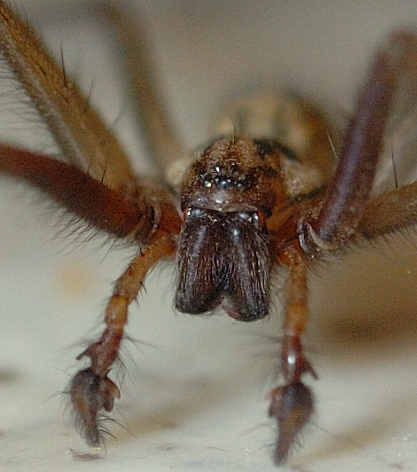
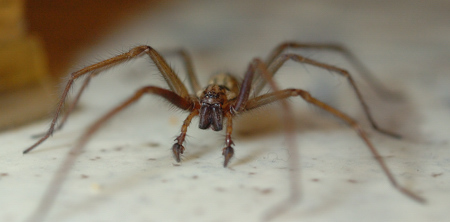
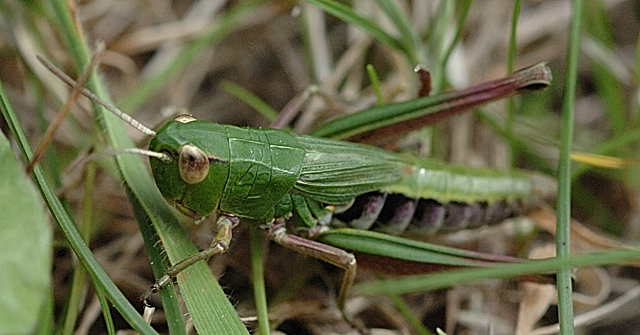
The background Usually with macro we want an uncluttered background, as its usually out of focus this is not a problem. We may also choose to have a light or dark background to provide contrast to our subject, or use a light background so as to get as much light as we can within the setup. The magic ingredients There are two magic ingredients that will make your macro photography better, the first is practice and the second experimentation, trying out different ideas, setups and angles, looking at new ways to view your subject and investigating possibilities that may or may not turn out as something very special. A lot of times you will be surprised by what you find, and discover a world that you were only part aware of. Macro for all seasons As we can undertake macro photography in a studio or our homes and by definition its small, and therefore needs little room, we can take macro photos any day of the year, perhaps buying a flower, or capturing a small creature. Everyday items from ball point pens to breakfast cereals can all be investigated, and perhaps we should consider nothing to be too small or difficult, just a challenge that we can overcome. In the summer months when out and about its probably not practical to get into extreme macro, but I have found that a macro lens even with tubes attached can be handheld allowing a range of interesting items to be photographed when I come across them. Other items like grasshoppers, bees and butterflies can be photographed with the macro lens alone. Handheld Macro While many think of macro, especially close-up macro being done with a tripod or in a studio this is not necessarily the case. All of the photos below were taken handheld.
See Also
|
||||||
|
||||||
| . | ||||||
|
||||||
|
|